
BUBBLESORPTION INSTALLATION GUIDE
Bubblesorption cannot be easier to install. The product can be fixed using Sta-Stuk, our aerosol contact adhesive with adjustable nozzle.
The back of each panel along with the wall where the product is to be fixed must be dry, flat, stable and free from any contaminants that could affect the adhesion. For best results, the adhesive should be applied at around 21° and well ventilated.
Adjust the nozzle on the spray can to the highest setting which gives the widest spray pattern then hold the can about 150mm to 300mm from the surface and spray the adhesive at 90° to the surface. If the spray pattern is too big, turn the nozzle to a smaller setting and/or mask any surrounding areas to protect from overspray.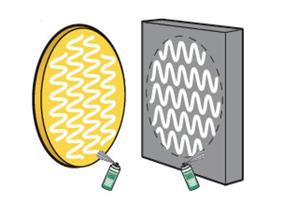
Spray the surfaces to be bonded with one side vertical and the other horizontal as shown in the image to the right hand side.
You can then refer to our design details showing a combination of alternative mounting methods. The various shapes of Bubblesorption are designed to be placed within a certain distance from each other for maximum effect and 6-7cm is usual.
Once a pattern has been decided, measure the distance between each tile and mark the wall where the tiles are to be fitted in relation to the pattern you want. It is best to use a marker that can be wiped away when finished. Then apply the adhesive to the tile and corresponding part of the wall as described above and apply the tile with a firm pressure. Because the adhesive is a contact adhesive, take care to position the tile correctly because it is unlikely the tile can be repositioned after initial fixing.
Note: The glue can tear pieces of paint and wallpaper when removed. We do not take responsibility if that happens.

