
Resilient Bar Installation Guide
Download this as a PDF file here
It is extremely important to install Resilient Bars correctly. Improper installation will nullify any advantage gained from using it in the first place.
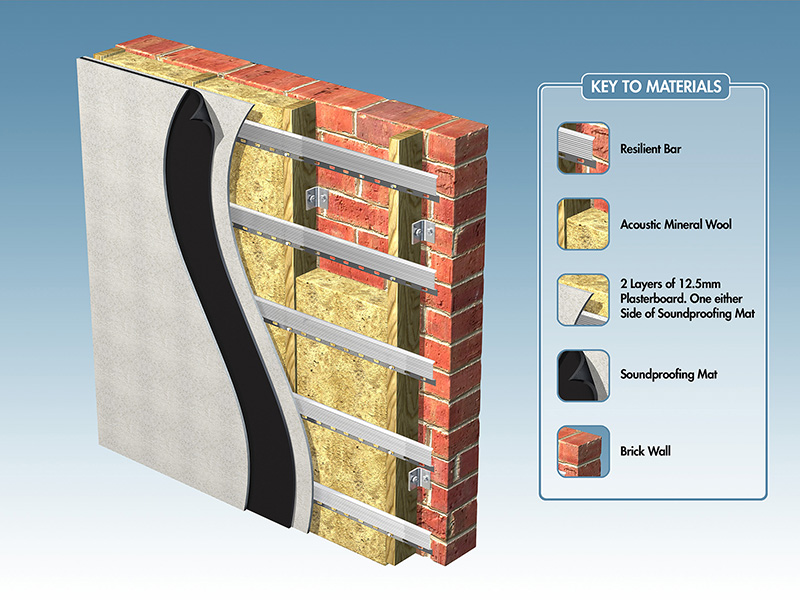
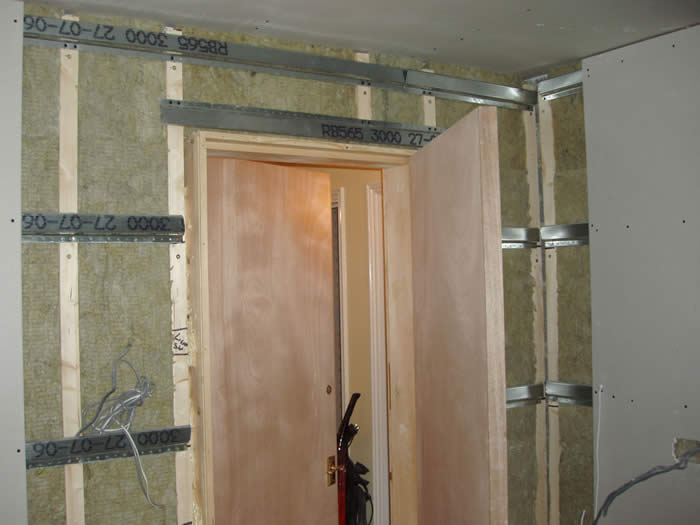
There are a few simple procedures that need to be followed when using Resilient Bars. On walls, the Resilient Bars should be mounted at 600mm centres horizontally from floor to ceiling with the narrow fixing flange along the bottom as shown.
This allows the plasterboard's weight to draw itself away from the framing. For ceilings, the bars should be spaced at 400 to 450mm centres and fitted across the joists or battens to which they are to be fixed and also around the perimeter. See photo below.
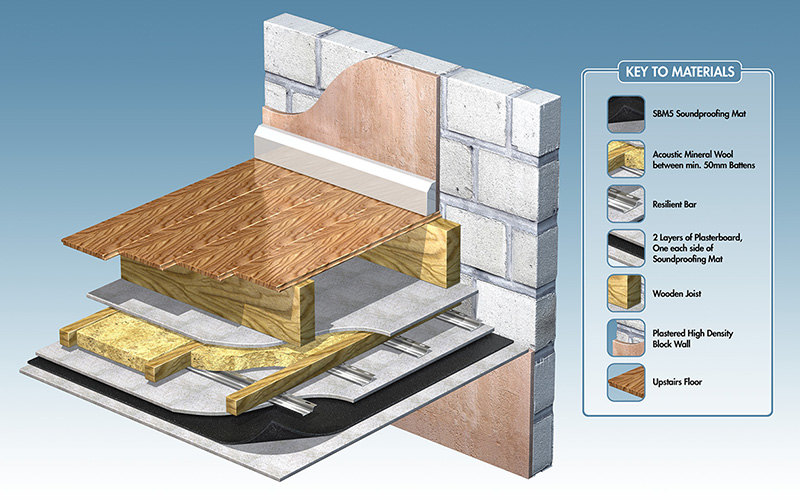
Cut-away ceiling plan alongside (12.5 x 1200 x 2700mm shows a double layer of 12.5mm high density acoustic plasterboard with SBM5 Soundproofing Mat sandwiched between the layers all fixed to Resilient Bars)
Cutting of Resilient Bar can easily be carried out with tinsnips or a hacksaw.
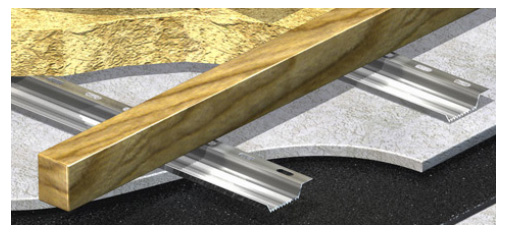
If fitted to the underside of an existing ceiling that still has the ceiling in place, 50mm battens should first be screwed to the ceiling at 600mm centres and at right angles to the joists. Care must be taken to ensure the battens are fixed through to the joists and NOT just to the plasterboard.
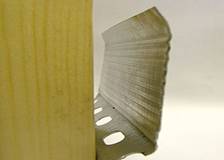
Resilient Bar is made from thin hot-dipped galvanised steel incorporating a corrugated web to which the plasterboard is screwed. The base flange has rectangular holes which enable the bar to be screwed directly to the stud.
The photo shows a Resilient bar System screwed to a stud wall before any plasterboard is installed. Click here to download our brief PDF pictorial guide for soundproofing a wall with our core products.
Bar Installation:
The bars should be fixed to joists/battens/studwork using either drywall or self drilling screws at 400 to 450mm centres below ceiling joists and at 600mm centres on timber stud walls.
Plasterboard:
A double layer of 12.5mm (or thicker) high density acoustic plasterboard should be used and fitted to within 3mm of the surrounding walls/ceiling and all joints should be staggered. All joints should be secured to the resilient bar with the appropriate length of self drilling screws at 230mm centres.
Fixing:
Secure the first or thickest layer of acoustic plasterboard to the resilient bar using the appropriate length self drilling screws. Screw the second layer of plasterboard on top of the first and through to the Resilient Bars using the correct length screws and taking care to overlap the joints of the first layer. It is essential that the screws securing the plasterboard are fixed between the joists and do not come into contact with the joists or battens. It is best to mark the position of the joists and resilient bars by placing marks indicating their position on the walls.
Edge Sealant:
After fixing the two layers of plasterboard, our Acoustic Sealant should be applied to fill the gaps around the perimeter edges and tooled smooth before decorating.
Finishing:
All plasterboard joints should be finished with traditional jointing methods and plaster skimmed, if desired, before decorating.
When resilient bars are properly installed, it should be possible to slightly flex the wall or ceiling surface. A lack of flex indicates that the channels are shorted out by screws fastened into the wood framing. Also, it usually does not matter which side of the wall is resiliently hung when insulating walls only but a better degree of soundproofing will be achieved if both sides of a stud wall are treated as described above.

