SOUNDPROOFING A GARAGE OR SHED
Just a quick line to say thanks for a fast, efficient and friendly service! I’ve never done any sound-proofing before, so your pre-sales help and advice was absolutely invaluable for a newbie like me.
All of the materials arrived on time, and I’m pleased to say the drum-booth project is now complete, with superb results. Our neighbours can once again sleep at night whilst my son drums into the early hours!
Thanks again
Tony White
(This customer followed the guide below and used our Studio Wall System)
Effective soundproofing of a garage is rarely possible due to the lightweight structure of the walls, roof, windows and doors within the confined space usually available. The best that can be achieved is a reduction in the noise breaking out of these buildings. Because the windows and doors are the weakest points, these should be addressed first. Assuming it is a masonry built garage the following can be utilised but if it is a timber built garage, they are usually too light and small to derive any substantial benefit from sound insulation so we suggest an alternative location is found or simply accept that the solution offered below will not be as effective but will still give a worthwhile soundproofing result.
SOUNDPROOFING EFFICIENCY
Before installing sound insulation as described above, your garage would have a very poor acoustic insulation value that would no doubt, wind your immediate neighbours up no end. As the windows are one of the weaker points, the sound insulation value of these would be no more than 24dB across the entire frequency range with the lower frequencies being a particular problem.
This means if music is being played at 110dB, 86dB of noise would be penetrating the window, which is pretty loud and your neighbours may take up arms. After installing the materials described below, and the window has been triple glazed, the window insulation value would be improved to around 34dB but if blanked off with the plasterboard and M20AD system, the insulation value would be equal to the walls or a bricked up window at around 40-45dB.
This means a maximum of 70dB would still be penetrating the walls of the structure. A vast improvement but still too loud for nearby neighbours,
particularly at night when other background noises are very much reduced, so if space permits, further measures are still necessary. A 'room within a room' will have to be created as described further into these instructions. The sound insulation improvement should give the walls of the garage an insulation value of at least 52dB which is a much more satisfactory result, should please your neighbours and prevent war breaking out in your neighbourhood.
WINDOWS
If light through the windows is desired, they should be triple glazed with different thicknesses of glass at staggered intervals and installed so as to be completely sealed. The middle panel should be installed at an angle. If light is not an issue, the window reveal should ideally be bricked up.
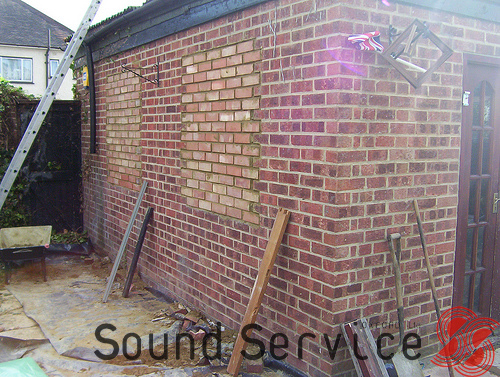
As this is a fairly permanent option, it may be preferred to infill with a more easily removable alternative when required.

In this case we would suggest making a removable acoustic window plug.
This could be inserted whenever required, but it must be an airtight fit when installed so may require draught proofing seals.
To read more about DIY window soundproofing click HERE
SOUNDPROOFED DOORS
Thin pressed steel up and over doors are impossible to insulate so should ideally be removed and bricked up or replaced with our heavy solid wood Acoustic Doors, fitted so they are sealed when closed. If this is not possible, assuming there is an alternative entrance, a concrete block wall should be built against the inside of the door or alternatively, a timber stud partition should be built on the inside of the door, infilled with Acoustic Mineral Wool (AMW) and clad with two layers of 12mm high density acoustic plasterboard using Resilient Bars. We supply easy to install Acoustic Doorsets and DIY door seal kits which can be seen HERE Alternatively, very good results can be obtained if a 1 hour fire door is installed using our Acoustic Doorseal Kits
SOUNDPROOFED DOUBLE DOOR ENTRY SYSTEM
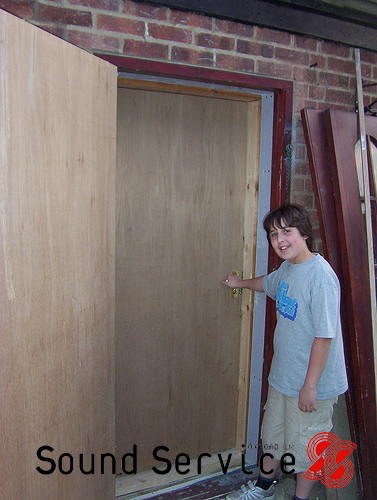
A double door entry system will be more effective at reducing noise breaking through. This entails two Acoustic Doors fitted so one opens outwards and the other opens inwards. Both should be fitted so as to be sealed when closed as previously described.
If you can't afford to use two of our doors then you could consider using two 1 hour fire rated doors (As shown left)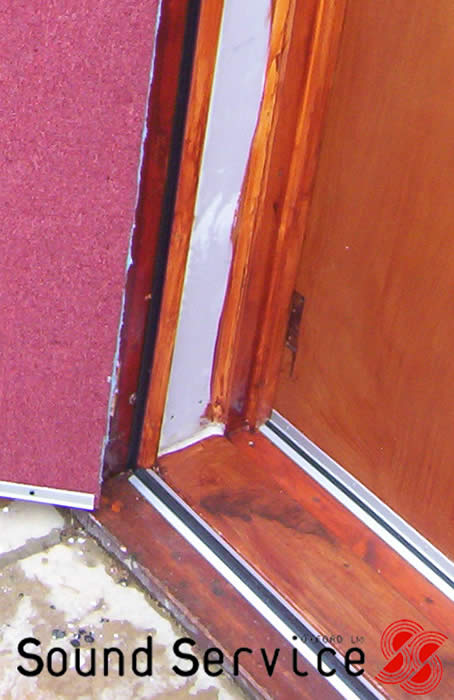
You can then uprate these using our acoustic door seal sets for doors by clicking the following link here
SOUNDPROOFING THE ROOF
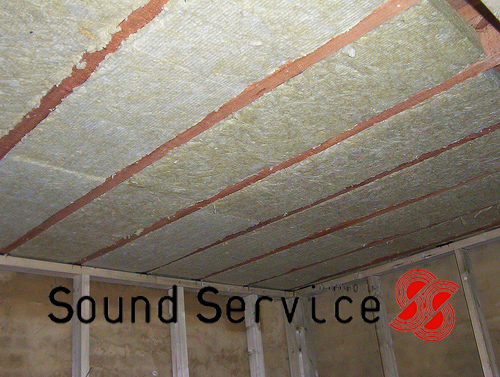
The supporting joists of a flat roof should be ideally infilled with our SoundBlocker Quilt or AMW, as shown left.
Then our Resilient Bars screwed across the underside of the insulated joists as shown below.
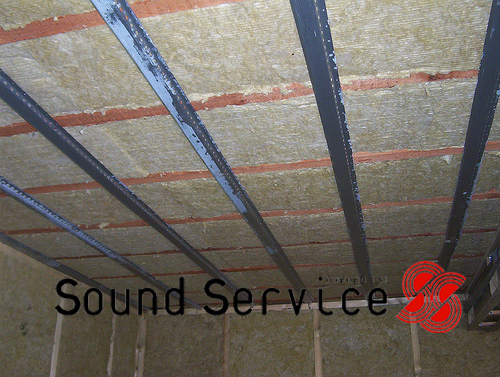
Acoustic Membrane should then be sandwiched between two layers of Acoustic Plasterboard that are screwed to the Resilient Bars. Sta-Stuk aerosol contact adhesive can be used to fix the Acoustic Membrane and as seen below.
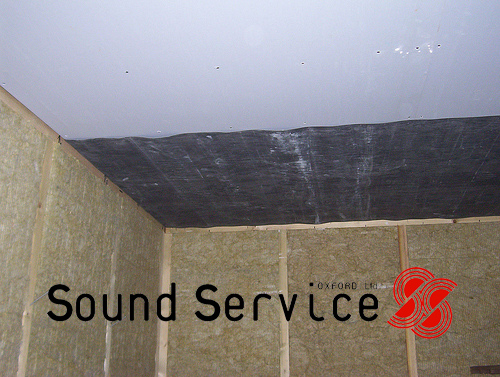
 With pitched roofs, if access allows, AMW can be placed between the rafters with SoundBlocker Membrane stapled to the rafters and then clad with a layer of 12.5mm high density acoustic plasterboard. Or for a better sound reduction, sandwich the SoundBlocker Membrane between two layers of Acoustic Plasterboard as already describe above.
WALLS
75mm timber stud should now be installed with a minimum 12mm space between the stud and the existing walls.
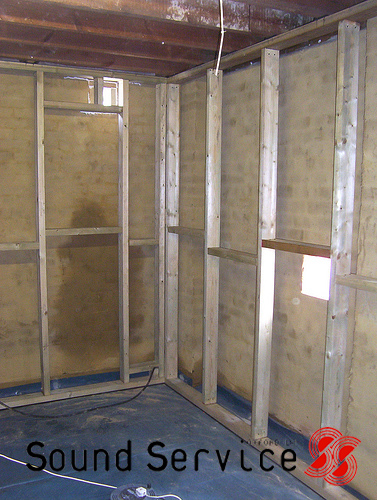
Next 100mm thick AMW100 acoustic mineral wool or the more efficient SoundBlocker Quilt is installed between the joists as below.
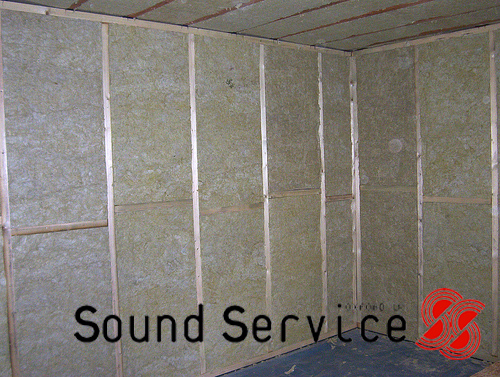
Finally the rest of the treatment is as described for the roof using Resilient Bars and Acoustic Plasterboard.
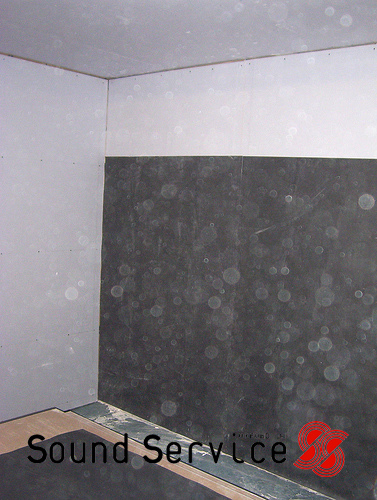
The only exception is that SBM5 Soundproofing Mat is used as the decoupling layer instead of SoundBlocker Membrane as shown on the left.
FLOORS

If the floor is of the square edged variety, it must be overlaid with SBM5 to seal up the joints. Then a floating floor using Acousticel R10 as the resilient layer with our high density QuietBoard acoustic flooring installed on top. With concrete floors there is no need to use the SBM5.
INTERIOR
Now the outside shell has been insulated, you will want to reduce the reverberation of sound within the room. Reverberation (echo) actually amplifies the sound originally emitted so this reverberation has to be absorbed.
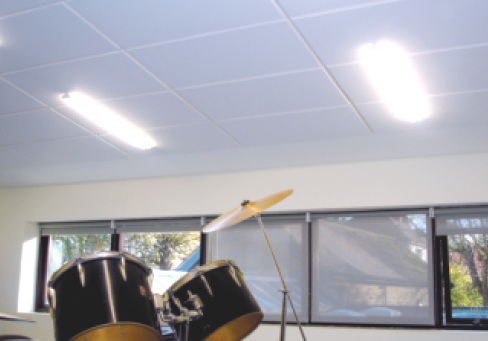
To achieve this we recommend Melamine Foam or more effective Echosorption Plus is used to line the walls and ceiling. This will reduce any reverberation and further reduce the amount of noise breaking out from the garage.
SOUND LOSS OVER DISTANCE
Depending on the level of background sound, noise usually decreases by 3db for each doubling of distance, so it is possible that a sound level of 110db generated within the garage can be reduced to as little as40dB from a comparatively short distance away. However, low frequency sound will always be a problem and can be further reduced if our Echosorption Plus is installed onto 50mm battens infilled with AMW50 already mentioned.
ACOUSTIC VENTILATION
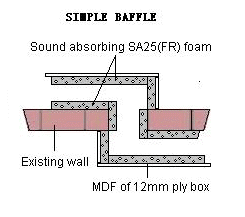
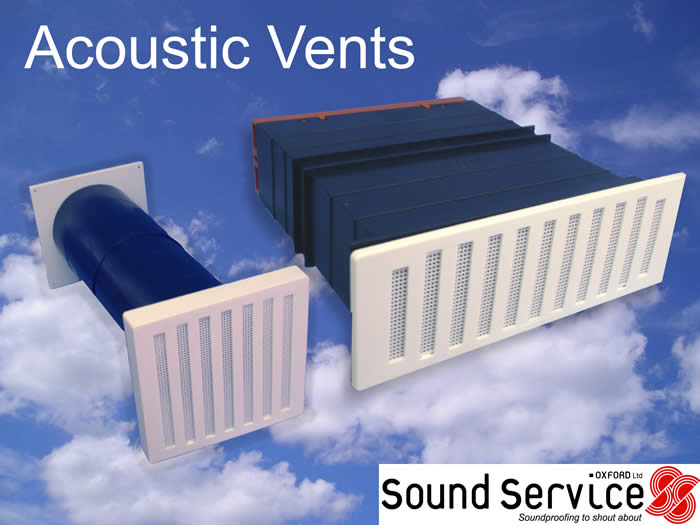
Now all this work has been done, the 'drums' have been set up and you are ready to produce some serious sounds, more air may be required after a while so it may be prudent to install a soundproofed ventilation system. For this it will be necessary to form a hole through the wall on each side, one at the bottom and the other at the top of opposite walls. Using 12mm ply or MDF, a simple acoustic baffle can be created by installing an open ended box over each side of the holes so there is no direct line of sight into the room. The interior of the boxes and the walls must be insulated with fire resistant sound absorbing foam (SA25FR) to absorb some of the sound that will exit through the vents. You could also consider using Acoustic Vents.
ALL IMAGES ARE OWNED BY MARK MASON AND SOUND SERVICE (OXFORD) LTD AND CANNOT BE USED OR COPIED WITHOUT PRIOR PERMISSION.
Mark Mason used our products to soundproof a garage for his son. His website can be seen here www.matthewmason.co.uk
Written by Stephen Young
© Sound Service (Oxford) Ltd 2004


